...
Showing posts with label Recipes. Show all posts

6/29/14

Iced Tea Days

Hibiscus Iced Tea
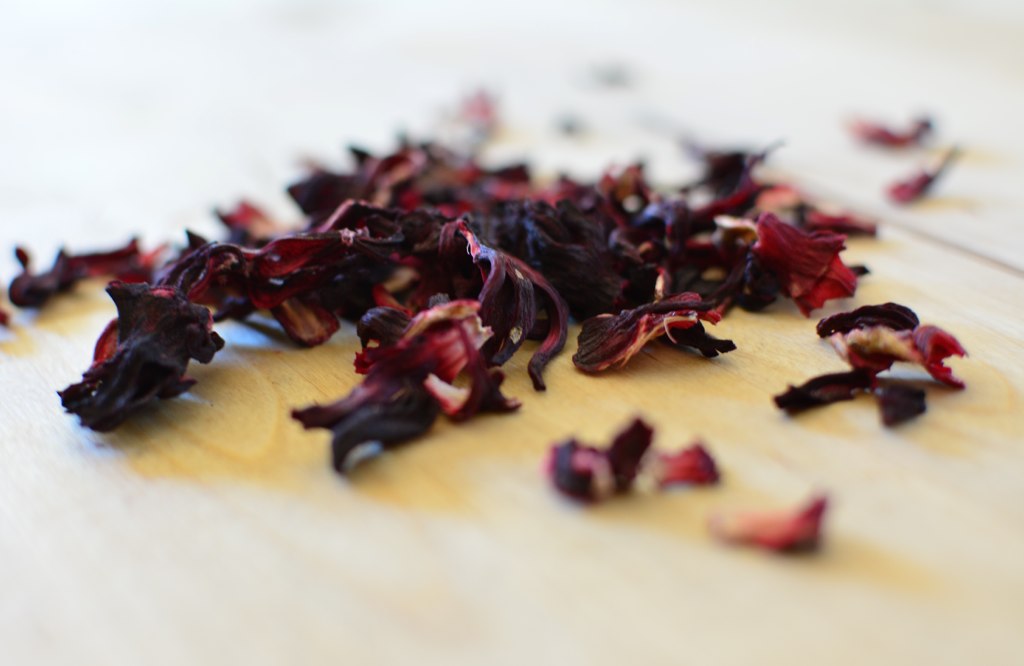
Dried Hibiscus Flowers
Hibiscus Iced Tea

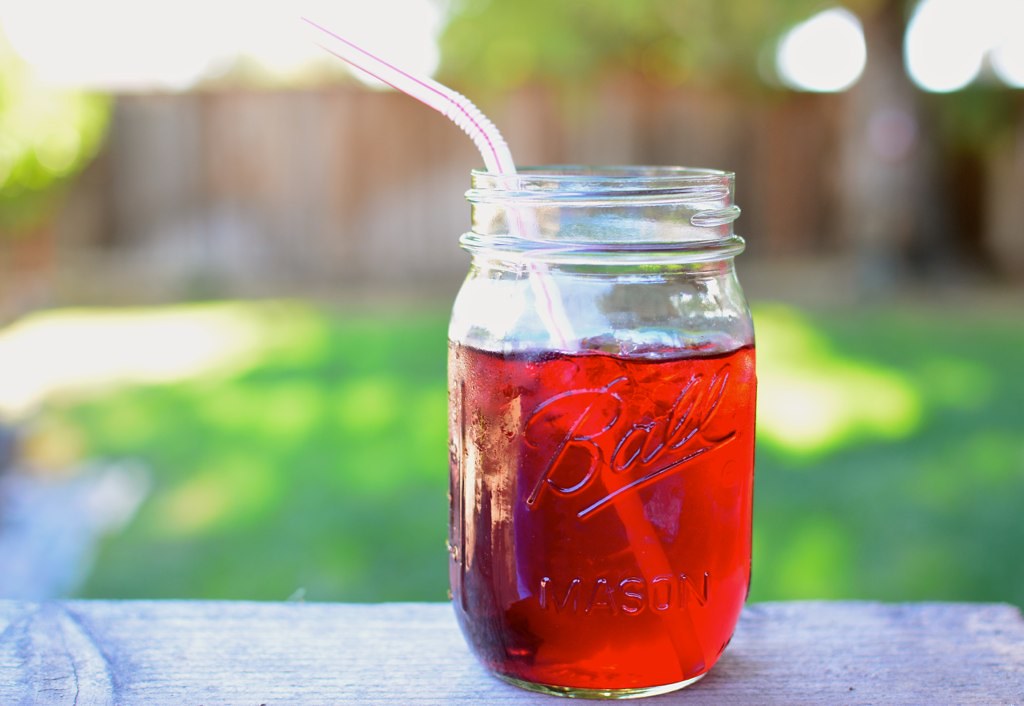
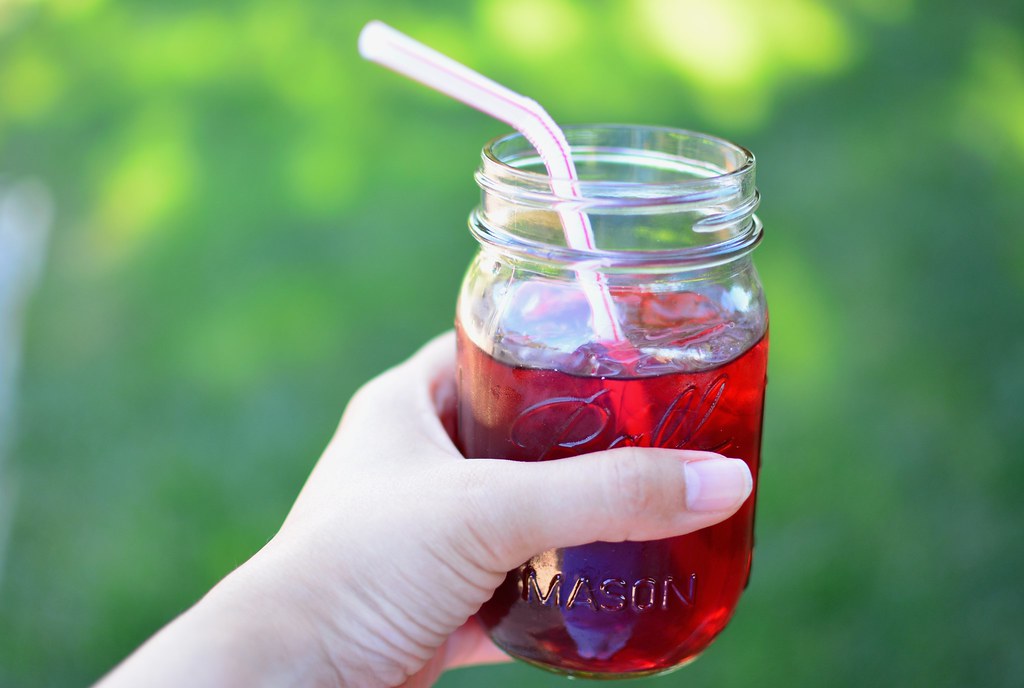
Happy Sunday! I hope you had a wonderful weekend. Summer has arrived in full force around here. Days have been hot and dry; so to keep cool I have been making lots of iced tea. My favorite is hibiscus iced tea known in spanish as "agua fresca de jamaica." It is absolutely delicious and its characteristic tangy flavor makes is super refreshing.  Also, I love the pretty ruby color.

Ingredients:
8 cups of water
1/2 cup dried hibiscus flowers (you can find it at hispanic supermarkets as "flor de jamaica")
Sugar to taste
Ice to serve

In a saucepan put the dried hibiscus flowers and 2 cups of water and bring to boil. Remove from heat, cover and let if cool for about 15 minutes. Transfer concentrate to a pitcher , you can strain it to remove the flowers or leave them. I prefer to leave them as they look beautiful at the bottom of the pitcher. Add remaining water and sweeten to taste. Chill for at least one hour before serving. Serve over ice.

Enjoy!

XX

Martha.

3/3/14

Pumpkin and Spice Granola

Pumpkin & Spice Granola
Pumpkin and Spice Granola

Hello friends, how was your weekend? I had such a busy weekend. It has been a bit rainy around here (finally we are getting some much needed rain). So taking advantage of the rainy weather I started doing some spring cleaning around the house and decided to finally tackle a long overdue filing project that I've been postponing for a while. But in between cleaning and sorting through piles of papers I had a craving for some granola. I love granola as a snack or for breakfast specially on hectic weekdays that there is no much time for an elaborate meal. I make a batch almost every week to always have it at hand. But I try to change up the flavors so we get some variety. This has become one of our favorite flavors. The brown sugar makes it more crunchy with a caramelized texture without been too sweet and the spices give it a nice sublte flavor.

Pumpkin & Spice Granola

Ingredients:

4 cups of old fashioned rolled oats 
1 cup of raw shelled pumpkin seeds
1/3 cup olive oil
1/3 cup honey
2 tablespoons brown sugar
1 teaspoon ground cinnamon
1/4 teaspoon ground cloves
Pinch of salt

Pumpkin & Spcie Granola

Method:
1. Preheat oven to 325 degrees Fahrenheit. Line a rimmed baking sheet with parchment paper and set aside.
2. In a large mixing bowl combine all ingredients using a spatula and mix well until all ingredients are combined. Spread on the prepared baking sheet. Bake for 25-35 minutes or until is golden brown. Halfway though the baking turn the sheet for even baking.
3. Remove from the oven and let cool completely. Place in an airtight container.

The granola will keep fresh for up to a week.

Enjoy!

Martha.

8/15/13

Zucchini Brownies

Zucchini Brownies

I made brownies... not that one needs a special reason to make brownies, but I had a couple of good ones. Things have been crazy busy around here and I needed a little pick me up and what's better than chocolate to brighten up a bad day (or week). And I had zucchini in the fridge that needed to be used.
I intended to use a recipe I had. I don't know where I got it from or how long ago, but I remembered the brownies were good. However, I couldn't find it anywhere... Mmmm I think I need to organize my recipes! But that is another story. I was determined to make zucchini brownies and my missing recipe wasn't going to stop me. So this recipe is the result of my desire to use up my zucchini and eat some chocolate. You can hardly taste the zucchini in the brownies, but it helps to create a lighter brownie.
Probably next time I'm flipping through the pages of one my books that old missing recipe is going to turn up. Now that I no longer need it. That always happens, once you stop looking for something it shows up unexpectedly. 

Chocolate Shavings

Zucchini Brownies

1 cup whole wheat pastry flour
1/4 cup unsweetened cocoa powder
1/2 teaspoon baking powder
1/2 teaspoon salt
6 tablespoons coconut oil
8 ounces (about 1 cup) semisweet or dark chocolate chopped
1/2 cup sugar
1/2 cup brown sugar
2 eggs
1 cup grated zucchini
1 teaspoon of pure vanilla extract
1 cup walnuts chopped (optional)

Directions: 
1. Preheat oven to 350 degrees Fahrenheit . Line a 9 inch square baking pan with parchment paper leaving a few inches of overhang (that really helps when removing the brownies from the pan). In a medium bowl combine flour, cocoa powder, baking soda, baking powder and set aside.
2. In a large microwave safe bowl combine coconut oil and chocolate. Heat in the microwave at 30 seconds intervals until all melted stirring every time to combine well. Stir in sugars and mix well to dissolve. Add eggs, grated zucchini, vanilla extract and walnuts. Mix in flour mixture until well combined without over mixing. 
3. Pour batter into prepared pan and bake for 35-40 minutes or until a toothpick inserted in the center comes out clean. Remove from the oven and let them cool for about 20 minutes. Remove from the pan and cut into squares or triangles. Store in an airtight container for up to 4 days. 

                         DSC_0455

Enjoy!

Martha.

6/16/13

Peach Jam

DSC_0302

And the peach madness continues around here... there is such a bounty and a bit of a race to preserve the fruit at the peak of its ripeness. So today I devoted the day to make jam. Lots of jam; I have to say I couldn't have done it without my husband's help. We made about 30 pounds of peaches into jam. So there was a lot of washing, peeling, cutting and of course lots of dirty pots and pans to wash. But it was all worth it. There is so much satisfaction  from growing our own food and sharing with the people we love. It is such a blessing.

I wish I could share with you some jam, but  that will be a bit complicated. So I thought I'd share the recipe with you instead. This is a reduced or low sugar freezer jam.I don't like things that are overly sweet and my father-in-law is diabetic, so I'm always trying to find ways to cook with less sugar. This is my go to recipe for jam. It is a very easy to make and the best part is that you can store it in the freezer. Thus, you can skip the water bath processing. 

DSC_0312


 Peach Jam
Adapted from Everyday Food Magazine

Ingredients
5 cups peeled and crushed peaches
1/3 cup lemon juice
1-1/2 cups sugar
1/3 cup low or no-sugar pectin
Freezer safe jars* (plastic or glass) thoroughly rinsed and dry.

* I like to use Ball Canning Jars, they work really well for storing food in the freezer*

Method:
1. In a pot over medium-high heat combine the peaches and lemon juice and bring to boil.
2. In a bowl combine sugar and pectin ans whisk to combine. Add sugar mixture to fruit and stir to combine. Allow to return to boil for 1 minute and remove from heat.
3. Fill jars leaving 1/2 inch of head space. Put lids on the jars and let jam cool and set at room temperature for about 3 hours. Label jars and store in the freezer.

Peach Jam


-Jam can be stored for up to a year in the freezer. When ready to use thaw in the refrigerator overnight.

Enjoy!

Martha. 

6/3/13

Coconut-Almond Granola


Coconut-Almond Granola


Happy Monday everyone! I hope you had a wonderful weekend. Things were a bit busy around here and Monday came way too soon (lol). Nonetheless, I had a wonderful weekend. Lots of cooking and some sewing as well (I'll share with you later this week).

One of the things I made this weekend was granola. I have been quite obsessed with granola lately and I have been making it quite often. I try to vary it every time so we don't get bored, but this is one of my favorite versions. It is crunchy and not too sweet. I love to sprinkle it on top of my yogurt in the morning or on fresh fruit. It also makes for a great snack.

Coconut-Almond Granola

3 Cups of Rolled Oats (not quick cooking)
1 Cup of unsweetened coconut flakes.
1/2 cup slivered almonds (or finely chopped almonds)
1/2 cup agave nectar
1/3 cup coconut oil melted*
Pinch of salt

Coconut-Almond Granola

*The instructions on the jar of coconut oil said to melt the coconut oil in a water bath (bain-marie). I did it one time and then I tried melting it in the microwave by microwaving it in 10 second increments. Both methods give the same results.

1. Preheat oven at 325 degrees Fahrenheit. Line a baking sheet with parchment paper.
2. In a mixing bowl combine all ingredients and mix well until everything is well coated with the oil and agave nectar. Spread on the baking sheet. Bake for 25-30 minutes or until it is a nice golden brown color. Turn the sheet half way through the baking process.
3. Remove from the oven and let it cool completely.

Coconut-Almond Granola


The granola will keep fresh for a week if stored in an air-tight container.

Enjoy!

Martha

3/13/13

Double Lemon Cookies

Double Lemon Cookies

Our lemon trees continue to provide us an endless supply of lemons. So lately it has been all about cooking with lemons. On Sunday I made lemon cookies with a lemon glaze. They are sooo good! Seriously, we can't stop eating them. My husband even called them his favorite cookies (and he is a bit of a tough critic). I used Meyer lemons, one of my favorite varieties. Meyer lemons are not as tart as other lemons and are very fragrant, which makes them a perfect addition to any recipe. However, you can use regular lemons if that is what you have available.

Double Lemon Cookies
Adapted from here. inspired by this.
Makes 12-14 cookies

Cookies
2 cups all purpose flour
1 teaspoon baking powder
1/2 teaspoon salt
1/4 teaspoon baking soda
6 tablespoons butter (3/4 stick) softened
1 cup granulated sugar
1 large egg
1/2 teaspoon pure vanilla extract
2 tablespoons fresh lemon juice
2 tablespoons grated lemon zest (from about 2 lemons)
1/4 cup sour cream

Lemon Glaze
2/3 cup confectioner's sugar
1 tablespoon grated lemon zest
3 tablespoons fresh lemon juice.

Double Lemon Cookies

1. Preheat oven to 350 Degrees Fahrenheit. In a medium bowl sift together flour, baking powder, salt, baking soda and set aside.
2. Using an electric mixer beat together butter and sugar until light and fluffy. Add egg and continue beating. Add vanilla extract, lemon juice and lemon zest and continue beating until well combined. Lower the mixer's speed mixer to low and add half of the flour mixture followed by the sour cream and finish with the rest of the flour.
3. Using an ice cream scoop spoon the batter on to baking sheets and bake for 20-25 minutes or until the edges are golden brown. Let them cool completely on a wire rack.
4. In a small bowl combine the confectioner's sugar, lemon juice zest and lemon juice  and stir until smooth. Drizzle over cookies.

DSCN3224

Enjoy!

Martha.

11/18/12

Brown Sugar Cookies


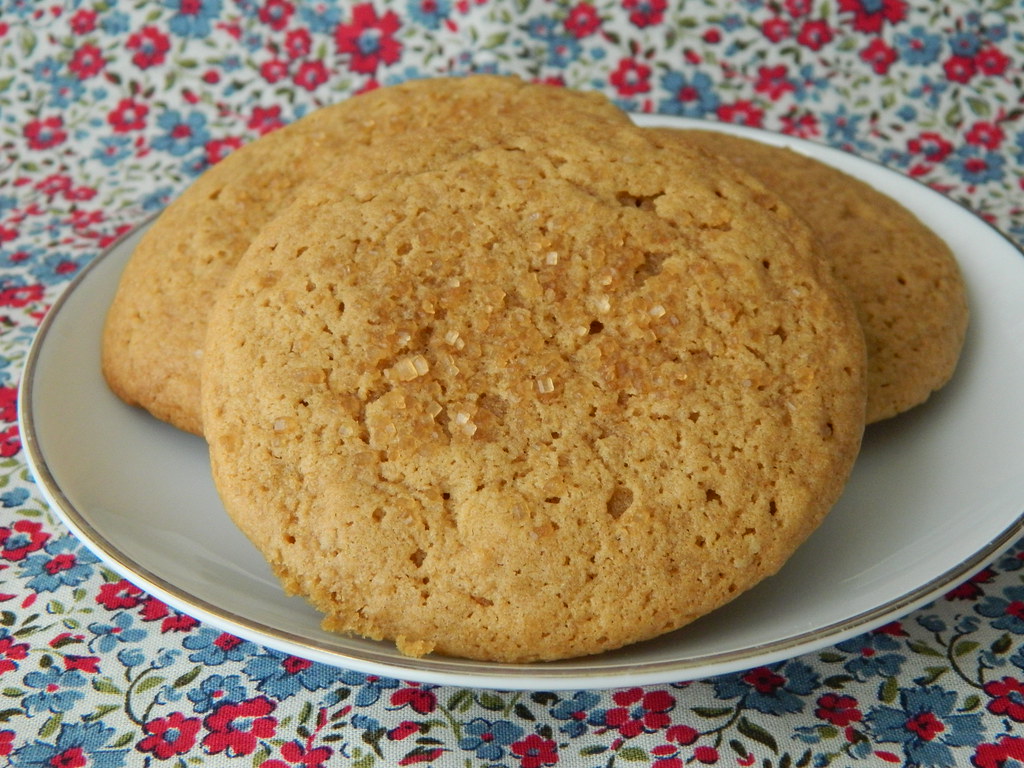
Yesterday I made a batch of Brown Sugar Cookies. They were I rainy day treat for my husband. He had to work, so the Buttery soft and  chewy goodness were a little pick me up after a long day of work. The recipe is an adaptation to one of Martha Stewart's Chocolate Chip cookies. My husband is not a big fan of chocolate (I'm a total chocoholic, so it totally baffles me his indifference to chocolate), every time I make chocolate chip cookies he asks me to leave some without chocolate chips. So I finally gave in and made him a whole batch of brown sugar cookies. They are delicious and you don't even miss the chocolate (and that is coming from a big chocolate lover). The added crunch of the sugar sprinkled on top adds an extra dimension to these cookies. We had them for breakfast this morning, a little Sunday indulgence, and they tasted even better. 


Brown Sugar Cookies
Adapted from Martha Stewart
(Makes about 3 dozen cookies)

2 1/4 Cups all-purpose flour
1 teaspoon baking soda
1/2 teaspoon salt
1 cup (2 sticks) unsalted butter at room temperature
1 1/2 cups brown sugar packed
1 tablespoon pure vanilla extract
2 eggs
Optional: 1/4 cup Demerara Sugar

1. Preheat oven to 350 degrees Fahrenheit (180 degrees Celsius). In a medium bowl wish together flour, baking soda and salt. Set aside.
2. Using and electric mixer at medium speed beat butter and sugar until creamy. Add vanilla and eggs and continue to beat until well incorporated.
3. Reduced speed to low and slowly add the flour mixture. Using an ice cream scoop drop scoops of batter on to baking sheets. Sprinkle with Demerara sugar. Bake for 10-12 minutes or until golden brown.
*Update: I noticed that I had written 1 1/5 cups of sugar. It should be 1 1/2. It has been fixed. Sorry about the typo*

Enjoy!

Martha

11/4/12

Granola Cookies


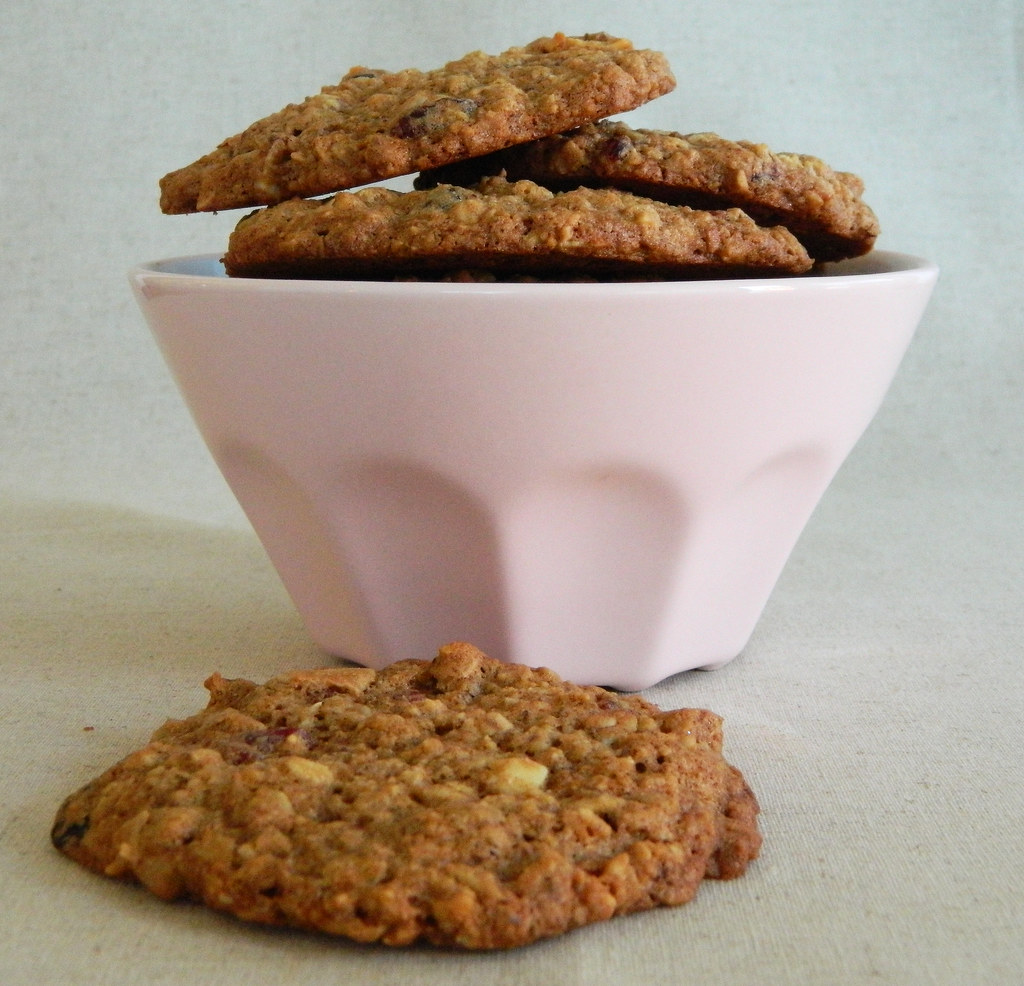
Another fabulous weekend at home... the weather was almost summer like. I spent a few hours gardening with my husband. And after the little workout, I was in the mood to do some baking. I had all the ingredients at hand so I decided to make  a batch of granola cookies.They are utterly delicious! 
Don't be intimidated by the long list of ingredients. They are actually very easy to make (similar to oatmeal cookies), but with the added goodness of whole grains and nuts. 

Granola Cookies
Makes about 2 dozen

Ingredients:
2 Cups old-fashioned rolled oats
1 cup all purpose flour
1/4 cup wheat germ
1/4 cup flax seed meal
1 cup unsweetened coconut flakes
1 teaspoon baking powder
1 teaspoon baking soda
1/2 teaspoon coarse salt
1 teaspoon ground cinnamon
1/2 cup sunflower seeds
1/2 cup almonds coarsely chopped
3/4 cup (1 and 1/2 sticks) butter softened
1 cup packed brown sugar (I prefer dark-brown sugar, but you can use light-brown if you prefer)
1/2 cup granulated sugar
2 large eggs
1 teaspoon pure vanilla extract
1 cup dried cranberries


Directions:
1. Preheat oven to 350 degrees Fahrenheit (180 degrees Celsius). In a large bowl stir together oats, flour, wheat germ, flax seed meal, coconut flakes, baking soda, baking powder, salt, cinnamon, sunflower seeds, almonds and set aside.
2. Using an electric mixer at medium speed beat together the butter and the sugars until light and fluffy. Add the eggs and vanilla extract. Reduce speed to low and slowly add the oat mixture and continue mixing until well incorporated. Mix in the cranberries.
3. Using and ice cream scoop, spoon the dough onto baking sheets covered with parchment paper. Using your fingers flatten the dough slightly. Bake for 15 minutes or until golden brown.
4. Remove from the oven and let cookies cool slightly on the baking sheet. Then transfer to a cooling rack to cool completely. 

Enjoy!

Martha.

9/16/12

Banana Bread


This weekend felt like it went by so fast. I spent a lot of time in the kitchen... I like, when possible, cook a few meals ahead, so during the week when we come home from work I can have dinner on the table in no time. I got this new cooking book. It has amazing recipes it was hard to decide which one to make first. I decided on the banana bread. I had some very ripe bananas, which make the best banana bread, and I wanted to used them before they went bad. It is so good. It was hard waiting for it to cool down so I could have a slice. 


Super Banana Bread
Slightly adapted from Williams-Sonoma Home Baked Comfort

Ingredients:
2 cups whole wheat pastry flour
2 teaspoons baking powder
1/2 teaspoon baking soda
1/2 teaspoon kosher salt
1/2 teaspoon ground cinnamon
1/8 teaspoon freshly grated nutmeg
3 ripe bananas, smashed with a fork
2 eggs
1 cup of firmly packed brown sugar
1/2 cup Greek style yogurt
1 teaspoon pure vanilla extract
4 teaspoons butter, melted


1. Preheat oven to 350 F (180 C). Line a 9X5 inch loaf pan with parchment paper or butter generously.

2. In a bowl sift together the dry ingredients (flour, baking powder, baking soda, salt, cinnamon and nutmeg) and set aside. In a large bowl whisk together the bananas, eggs, sugar, yogurt, butter and vanilla. Add the mixture to the dry ingredients and stir until just combined.

3. Bake for 35-40 minutes or until a toothpick inserted in the center comes out clean. Let cool for a few minutes before removing from the pan.

Enjoy!

Martha

9/4/12

Dessert In A Jar


I love using mason jars. I they are so versatile and anything you put in them looks so pretty. On this occasion I used my mason jars to bake and serve dessert in them. The perfect combination: a warm, gooey, decadent brownie topped with vanilla bean ice cream. Oh perfection! an the beauty of this dessert is that it can be made up to a day ahead or serve it right out of the oven.

Brownie Sundaes

*I was given a box of this Ghirardelli Brownie Mix as a gift and that is what I used. I usually don't use mixes when baking, but this one surprised me. Ghirardelli is one of my favorite chocolate brands and their mixes are made with the same quality chocolate they are known for. Let me tell you, after the first bite I became addicted to this mixes. So yummy!

Ingredients:
Makes 8-10

Your favorite brownie recipe*
Vanilla ice cream
Wide mouth mason jars

Fill about 1/3 of the jars with brownie mix. Bake according to recipe directions (most recipes for brownies indicate to bake them in a pan so the baking time might be shorter so keep and eye on your brownies). Let brownies cool and while they are still warm top them with a scoop of ice cream and serve.
If you decide to make them ahead; warm up brownies in the oven or the microwave when you are ready to serve them.

Enjoy!

Martha


8/26/12

Orange Cookies


This weekend felt like I was very productive. I had time to cook and bake and I made a lot of progress on my new quilt, but I will tell you more about my sewing on a later post. I made this amazing orange cookies and I thought I'll share the recipe with you. I have been making this cookies for a long time (they are my husband's favorites). I really don't know where the recipe came from originally. A friend gave it to me years ago when I first became interested in cooking, but I don't know where she got it from. Over the years I have made some adjustments to the original and this is my favorite version.


Orange Cookies
Makes 16-18 cookies

Ingredients:

1-3/4 cups all-purpose flour
1/4 cup corn starch
4 teaspoons of baking powder
1/4 teaspoon salt
Zest of 1 orange (about a tablespoon)
1/2 cup butter softened
1 cup sugar
1 egg
1/4 cup fresh orange juice
Optional: 18 almonds to garnish cookies


Method:

1- Preheat oven to 350 degrees Fahrenheit (180 degrees Celsius). In a bowl whisk together flour, corn starch, baking powder, salt, and orange zest and set aside.
2- Using an electric mixer beat together butter and sugar until pale and fluffy. Add egg and continue to beat until well combined; then add orange juice and flour mixture and continue beating until all ingredients are well incorporated.
3- Using and ice cream scoop spoon batter onto  baking sheets and top each with an almond. make sure you press the almond slightly into the dough. Bake for 15-18 minutes or until golden brown.

Enjoy!

Martha.

7/30/12

Peach-Raspberry Jam


Lately I have been experimenting with canning and preserving food. I have tried the water bath canning method with great success. But the process can be time consuming... and I do still find it a bit daunting. Then, I discovered freezer jam. It is so easy and much faster than the traditional canning  method since the jars go into the freezer all the processing time is eliminated.
This is my go to recipe for freezer jam; it can be easily adapted for other fruits and so far it has given me excellent results every time I make it.


Peach-Raspberry Jam

Ingredients
4 cups peeled and crushed peaches
1 cup raspberries
1/3 cup lemon juice
1-1/2 cups sugar
1/3 cup low or no-sugar pectin
Freezer safe jars* (plastic or glass) thoroughly rinsed and dry.

* I like to use my mason Ball Jars with these Lids

Method:
1. In a pot over medium-high heat combine the peaches, raspberries and lemon juice and bring to boil.
2. In a bowl combine sugar and pectin ans whisk to combine. Add sugar mixture to fruit and stir to combine. Allow to return to boil for 1 minute and remove from heat.
3. Fill jars leaving 1/2 inch of head space. Put lids on the jars and let jam cool and set at room temperature for about 3 hours. Label jars and store in the freezer.

-Jam can be stored for up to a year in the freezer. When ready to use thaw in the refrigerator overnight.

Enjoy!

Martha.

6/30/12

Peach Coffee Cake with Almond-Oat Streusel


These past few days everything has been very peachy in my house. The peach tree in the garden continues to surprise me with the amount of fruit that is giving us. If you could look into my kitchen. I have baskets all around filled with peaches: peaches to give out to friends, peaches to cook with, peaches to eat, peaches everywhere! But I don't get tired ot them. So to change things up, per say, I made a Peach Coffee Cake with Almond-Oat Streusel. It is delicious: soft cake studded with sweet jucy peaches topped with acrunchy streusel. Just amazing.


Peach Coffee Cake with Almond-Oat Streusel
Adapted from Williams-Sonoma

Ingredients:
For the streusel:
1/2 cup all-purpose flour
1/3 cup firmly packed brown sugar
1/2 cup old fashioned oats
1/2 cup toasted almonds roughly chopped
6 tablespoons cold butter cut into pieces

For the Cake:
1 1/2 cups all-purpose flour
3/4 cup sugar
1 1/2 teaspoon baking powder
1/4 teaspoon baking soda
1/2 teaspoon salt
1 egg
4 tablespoons butter softened
1/2 cup sour cream
1 1/2 teaspoons vanilla extract
1 teaspoon almond extract
2 firm ripe peaches peeled and cut into 1 inch thick slices


Directions:
1. Preheat oven to 350F (180C). Grease and flour a 9-inch spring foarm cake pan.
2. For the streusel: in a bowl combine flour, brown sugar, oats, almond butter and salt. Using a pastry cutter or your fingers cut the butter or rub with your fingers to foarm coarse crumbs and set aside.
3. In a medium bowl sift together flour, baking powder and salt. Set aside. Using an electric mixer beat the butter and sugar together until light and fluffy. Add the egg and continue to mix. Add the flour mixture in three additions alternating with the sour cream (flour-cream-flour-cream-flour). Add vanilla and almond extracts and mix to combine.
4. Pour batter into prepared pan and spread evenly using a spatula. Arrange peach slices in concentric circles slightly pressing down into the batter. Sprinkle streusel on the top.
5. Bake for 40-45 minutes or until the toppping looks golden brown and a toothpick inserted in the center comes out clean. Remove from the oven and let it cool on a wire rack for about 10 minutes before removing from pan. Let cool completely.


Enjoy!

Martha.

6/11/12

Olive Oil-Yogurt Cake


Sunday was a great day; I spent most of the day outside gardening with my husband. Mini and Mona had to stay inside the house because it was a bit warm for them to be outside and Mona's allergies were acting up so we wanted to keep her away from pollen as much as possible. I don't think they minded staying indoors though; they stayed cool and napped most of the time. Once and a while they would come to they window to check on us, but they would go back to their beds.
After working in the garden I decided to bake a cake. I had my eye on a French yogurt cake a saw in Bon Appétit weeks ago. As I started gathering the ingredients I realized I had run out of vegetable oil... I didn't want to go to the store (again) to get it since I had already gone in the morning. What to do? I know, improvise! I switched the vegetable oil for olive oil and embellished the cake with raspberries I had bought in my morning trip to the market. The results were beautiful and delicious. I had a piece for breakfast this morning and it tasted amazing!


Olive Oil-Yogurt Cake
Adapted from Bon Appetit
Serves 8
* I just arranged the raspberries on top as decoration, but if you wish you could mix the raspberries in the batter for a more intense raspberry flavor.
Ingredients
1 1/2 cups flour
2 teaspoons baking powder
3/4 teaspoon kosher salt
3/4 cup sugar
1 tablespoon lemon zest
3/4 cup Greek yogurt
1/2 cup olive oil
2 large eggs
1/2 teaspoon pure vanilla extract
1/2 cup raspberries


Method:
1. Preheat oven 350° F (180° C). Line a 9X5 loaf pan with parchment paper.
2. In a medium bowl whisk together flour, baking powder and salt. Set aside.
3. In a large bowl pour sugar and lemon zest and using you finger rub sugar and lemon zest together until sugar is moist. Add yogurt, olive oil, eggs and vanilla extract and whisk to blend well. Incorporate flour mixture and mix until well combined.
4. Pour batter into prepared pan and smooth the top. Arrange raspberries on top and bake for about 55 minutes or until a toothpick inserted in the center comes out clean. Allow the cake to cool in the pan for  a few minutes then transfer to a wire rack to cool completely.

Enjoy!

Martha.

5/29/12

Roasted Corn Salad


So Memorial Day weekend is over... I spent the weekend at home with my husband trying to relax and not doing much. Although, on Saturday we took Mini and Mona to the vet and it was a bit crazy, but I will tell you about it on a later post. For now I want to tell you about this amazing roasted corn salad I made yesterday. I was not planning on grilling anything this weekend, but what is Memorial Day without outdoor cooking? Of course, the most important thing is to remember the men and women who had died serving our country. But, on a lighter note,  it also marks the start of summer and  outdoor parties. 


Roasted Corn Salad
Serves 4

Ingredients
2 cups grilled corn (from about 2 ears)
1 cup cherry tomatoes cut in half
2 spring onions (scallions) finely chopped
1 medium avocado diced
2 tablespoons cilantro finely chopped
1 Serrano or jalapeno pepper finely chopped (optional)*
2 tablespoons lemon juice (from about 1 lemon)
Salt

Method:
In a medium bowl mix together corn, tomatoes, onions, avocado, cilantro and pepper (if using). Stir in lemon juice. Season with salt to taste.

*Remove seeds from pepper for a milder flavor.

Enjoy!

Martha.

5/18/12

Carrot-Zucchini Muffins


Wednesday was farmer's market day in town. The market runs from May through September and it is a great place to buy local organic foods and  produce. Every time I go I want to buy everything; this time I bought asparagus, kale, red onions, fresh garlic, broccoli, cucumbers, lettuce, carrots and zucchini. I steamed some carrots and broccoli for Mini and Mona and they loved it! I also made carrot-zucchini muffins. This is a great recipe, very versatile; I had made the muffins using only carrots or only zucchini with very good results, but my favorite is using half and half. They are not very sweet, so they are excellent for breakfast or to eat any time of the day.


Carrot-Zucchini Muffins
Slightly adapted from Whole Living Magazine, April 2011
Makes 12
*You can substitute the buttermilk for yogurt or milk with a few drops of lemon juice.

Ingredients:
3/4 cup all-purpose flour
1/2 cup whole wheat flour
2 tablespoons wheat germ
1 teaspoon ground cinnamon
1 teaspoon baking powder
1/2 teaspoon baking soda
1/8 teaspoon salt
1/3 cup canola oil
1/3 cup buttermilk*
2 eggs
3/4 brown sugar
1 cup finely grated carrots
1 cup finely grated zucchini

Method:
1. Preheat oven to 350 degrees and line a standard muffin tin with paper liners.
2. Remove excess water from the zucchini by placing it on a colander or between two paper towels and squeeze it.
3. In a medium bowl whisk together dry ingredients (flours, wheat germ, cinnamon, baking powders, baking soda and salt), and set aside. In a large bowl whisk together wet ingredients and sugar (oil, butter milk, eggs, sugar, carrots and zucchini). Incorporate flour mixture into wet using a spatula mix until just combined without overmixing.
4. Pour batter into baking cups and bake for about 22 minutes or until a toothpick inserted in the center comes out clean.


5. Remove from the oven and let muffins cool for a few minutes in the pan. Transfer to a wire rack finish cooling.


Enjoy!

Martha.

5/1/12

Pasta With Charred Grape Tomatoes


Sunday was a great day! I love the feeling at the end of the day when one feels that things got done. Sunday was one of those days. My husband and I got up early in the morning (well not too early, early for a Sunday) and drove to the home improvement store. We bought some sacks of compost and organic fertilizer for the vegetables. after we got home we worked in the garden for a while. It might not be some people's idea of fun, but we had a lot of fun.
Later in the day I made pasta with grape tomatoes. Our tomato plants are still you, so the tomatoes were from the market. But still they were pretty good. the recipe I got the inspiration from calls for slow roasted plum tomatoes. However, I only had grape tomatoes on hand and roasting the tomatoes takes some time (about 45 minutes), so to speed things up I opted to broil the tomatoes. It only took 5-8 minutes and they tasted great. Plus I got to use some of my fresh oregano.


Pasta With Charred Grape Tomatoes
Serves 2

Ingredients:
2 cups grape tomatoes
1/2 lb short pasta such a shells or elbow
Salt and pepper
1 tablespoon extra virgin olive oil
2 garlic cloves
1 teaspoon red pepper flakes
Basil and oregano leaves for garnish
Parmesan shavings for garnish


Method:

1. Place grape tomatoes on a baking sheet and broil on high for about 5-8 minutes or until the skins begin to look charred.
2. Bring a large pot of salted water to boil and cook pasta according to package directions. Drain the pasta and reserve 1 cup of pasta water. Meanwhile in skillet heat oil over medium high heat. Suttee garlic for 1-2 minutes until fragrant, then add the pepper flakes and continue to stir for another minute. Add broiled tomatoes and 1/2 cup of the pasta water. Season with salt and pepper and breakup the tomatoes with a spoon and cook for about 5 minutes to thicken the sauce.


3. Toss the pasta together with the sauce and add more pasta water if necessary. Serve immediately topped with basil, oregano and Parmesan shavings.

Enjoy!

Martha.